5. User manual for Android devices
Note
To use ginlo, at least Android 5 is required.
Audio Video Telephony works on devices from Android 8.
This section explains each of the menu items and the features found within them.
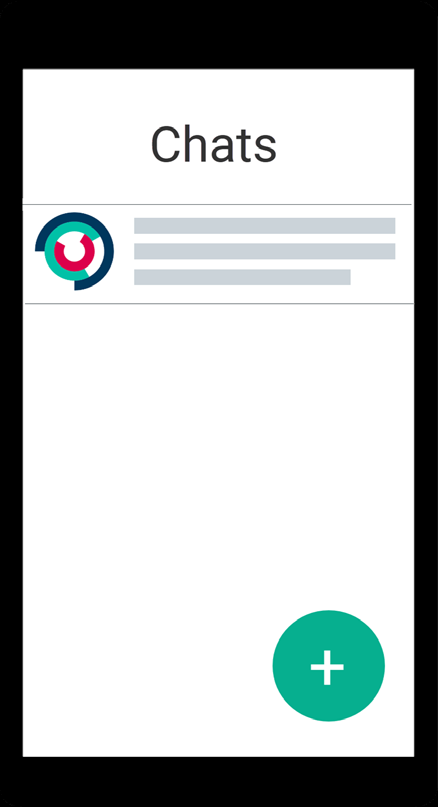
After launching ginlo on your Android device, you will find yourself in the chat overview. From here you will be taken to the three main menus, which contain other submenus:
“Toaster” menu is located in the upper left corner.
Menu “+” can be seen at the bottom right.
Menu “In chat” becomes visible when you open a chat in the chat overview.
5.1. Menu „Toaster“
By tapping the button in the upper left corner you get to global settings with following submenus:
5.1.1. Avatar - Profile
Tap the avatar in the upper left corner. You will be taken to your profile.
In your profile you can add an avatar, change your display name, mobile number (P) or status, enter business details (B), display your ginlo ID, use a QR code or delete your ginlo account.
To edit your profile, tap the pencil in the upper right corner.
5.1.1.1. Avatar
With an avatar you show your counterpart who you are. You have the option of taking a current photo or selecting a locally stored image. In both cases you have to allow ginlo access to your camera or photo album. If you refuse, you will not be able to take a photo or select an image. A refusal can be changed on your smartphone under Settings -> Apps -> ginlo -> App settings -> Permissions!
Tap on the avatar and select take photo or select image in the menu that pops up and follow the further instructions.
Tapping Delete will delete your avatar immediately! You can undo this by tapping the arrow in the top left corner; you will be taken back to the Avatar - Profile menu.
Apply your changes by tapping the checkmark in the upper right.
By tapping the back button on your phone or the arrow in the upper left, you exit this menu.
5.1.1.2. Display name
You can change the display name selected during the initial setup. To do this, tap on the name and edit it. Scroll to the next entry.
5.1.1.3. Status
For status, you can enter your own text and use an emoji. For absence, you can select its duration and leave an absence note. Confirm your entry by tapping the hook at the top right.
Hint
If you change your status, old entries will be saved for reuse.
5.1.1.4. Cell phone number (P)
If the cell phone number of your smartphone has changed, you can correct it here. To confirm, you will receive a code that you need to enter, just like during the initial setup.
5.1.1.5. First name, last name, department, cell phone number, e-mail address (B)
This data can be changed in the business area only by your administrator.
5.1.1.6. ginlo ID and account type
Your ginlo ID was automatically generated during your registration and consists of 8 characters (letters and numbers). It is a unique identifier and cannot be changed. The ginlo ID can be used as a search function in your contacts. Give your ginlo ID to friends and acquaintances so that you can communicate with them via ginlo. This way, contacting or searching is possible even without giving out a mobile number or email address.
In addition, it is displayed at this point whether your account is a private or a business one.
5.1.1.7. QR code
As an alternative to the above contacts, you can have your counterpart scan the displayed QR code - the safest and most convenient way to confirm your identity. Modern devices can recognize codes of older devices - but codes for very old devices are not generated.
5.1.1.8. Delete account
Warning
ATTENTION!!!
Use this option only if you are absolutely sure that you do not want to use ginlo anymore. This function cannot be undone! If you confirm Delete account, you will lose your ginlo account and all content forever!
Tap Delete account. You will be prompted to enter your device password or your PIN for authorization. After that you have to enter your ginlo ID for security.
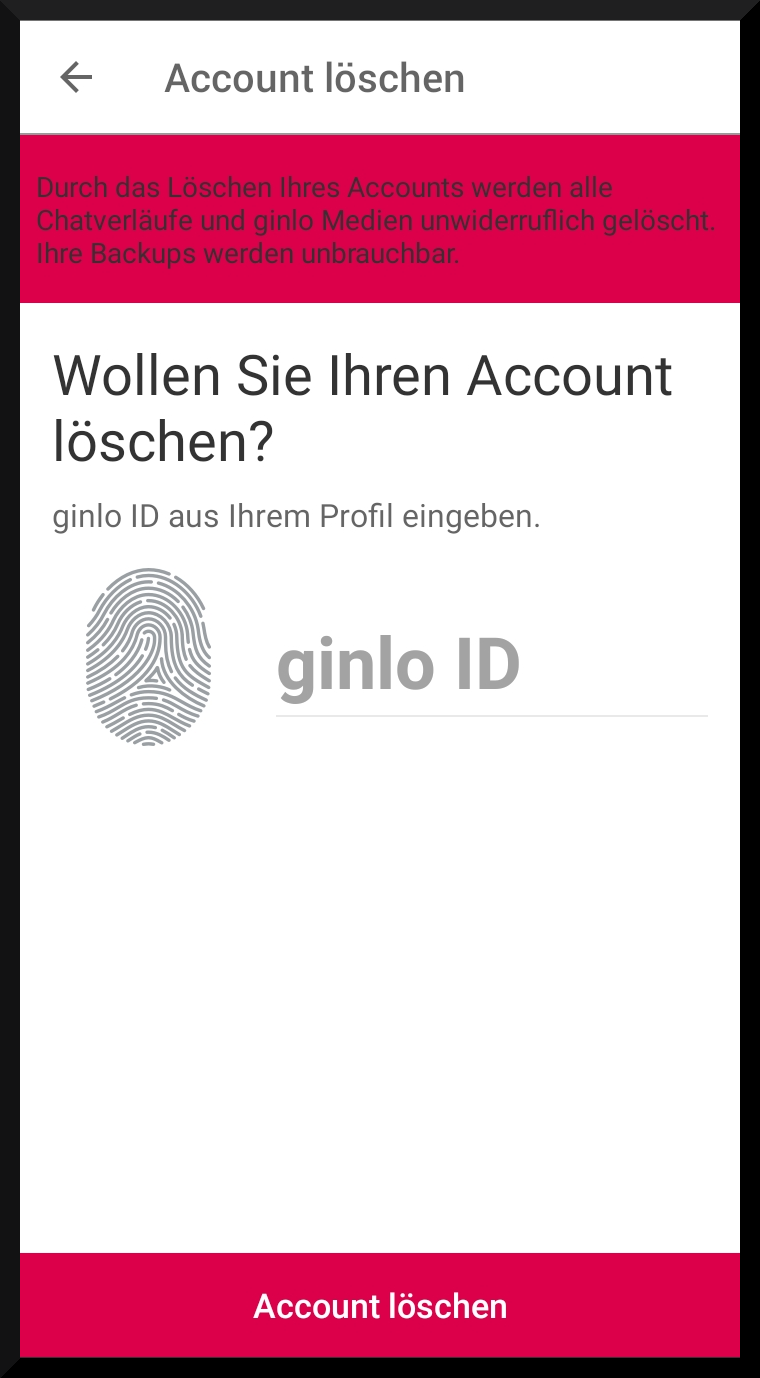
Tap Delete account again to confirm the process. This will take some time.
If you actually perform this action, we would be interested to know why!
Too bad you deleted your ginlo account :-(
5.1.2. Chats
Tapping the Chats menu item takes you to the chat overview.
Your chats are displayed in the order in which they were used. The most recently used chat is at the top.
The avatars of your chat partners are color-coded. You can read their meaning here.
Detailed descriptions of the chat overview can be found in the “+” menu and in the “In Chat” menu.
5.1.3. Channels (P)
ginlo offers you possibility to subscribe to defined channels (RSS feeds), to recommend them to others, to be informed about new news or to unsubscribe from the channel.
For selection you can use alphabetical listing or search function. Scroll through listing. Tap A/Z in the upper right to change sort order or use the search function in the upper right.
Tap on a channel and select the content you are interested in from those offered. By subscribing you get to the startpage of the channel provider.
By tapping the cogwheel in the upper right corner, a submenu will appear. Here you can view information about the provider, recommend the channel to others, switch the notification on or off, or unsubscribe from the channel. The procedure is self-explanatory.
Subscribed channels are marked with a green tick and displayed in your chat overview.
You can subscribe to different channels on your paired devices.
Hint
The channel operator is solely responsible for all contents and the presentation, especially the order of the displayed messages.
You can unsubscribe from the channel by opening it in the chat overview and tapping on the cogwheel in the upper right corner. In the submenu that opens, you will find the entry Cancel.
5.1.4. Contacts
In this section you can manage your ginlo contacts, send invitations, search for users and synchronize your contacts with your address book.
Click on contacts in the navigation bar on the left or on avatar in the top bar in the chat. A list of your contacts will be displayed.
The contacts section consists of the following tabs for ginlo Business users:
Tabs |
Data type |
Who is displayed here? |
|---|---|---|
|
Users with whom you have private chats |
Users from your device address book, if you have given access to the app Note Access to your address book is only needed for matching with your contacts. We do not access this data in plain text at any time. |
|
Contacts from the same company |
Users with e-mail addresses from your company |
|
Contacts from your team |
Users invited by the same company as you Note This list corresponds to your company list. However, it can also contain external users invited by your administrator, e.g. customers or partners. |


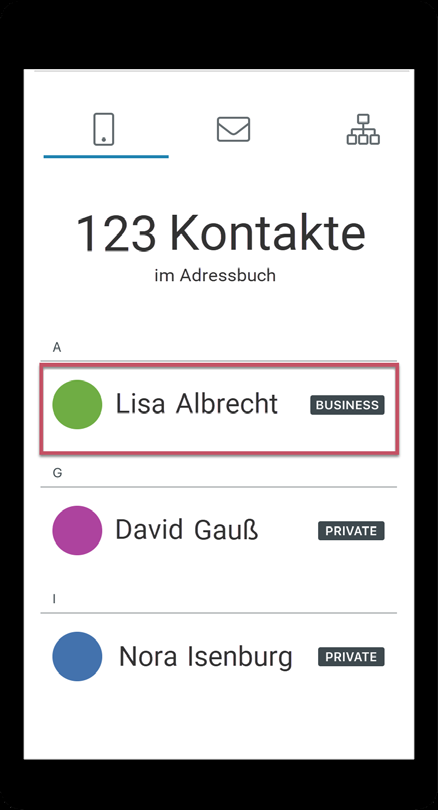
Per contact an avatar, the stored contact data and the account type (PRIVATE or BUSINESS) are displayed.
The contacts are sorted by the last names. On the left edge the Security of your contacts is marked by a color code.
(A comprehensive sorting option of the contacts is planned).
5.1.4.1. Find ginlo user
Tap the + icon at the bottom right to add. You will be taken to Find ginlo users:
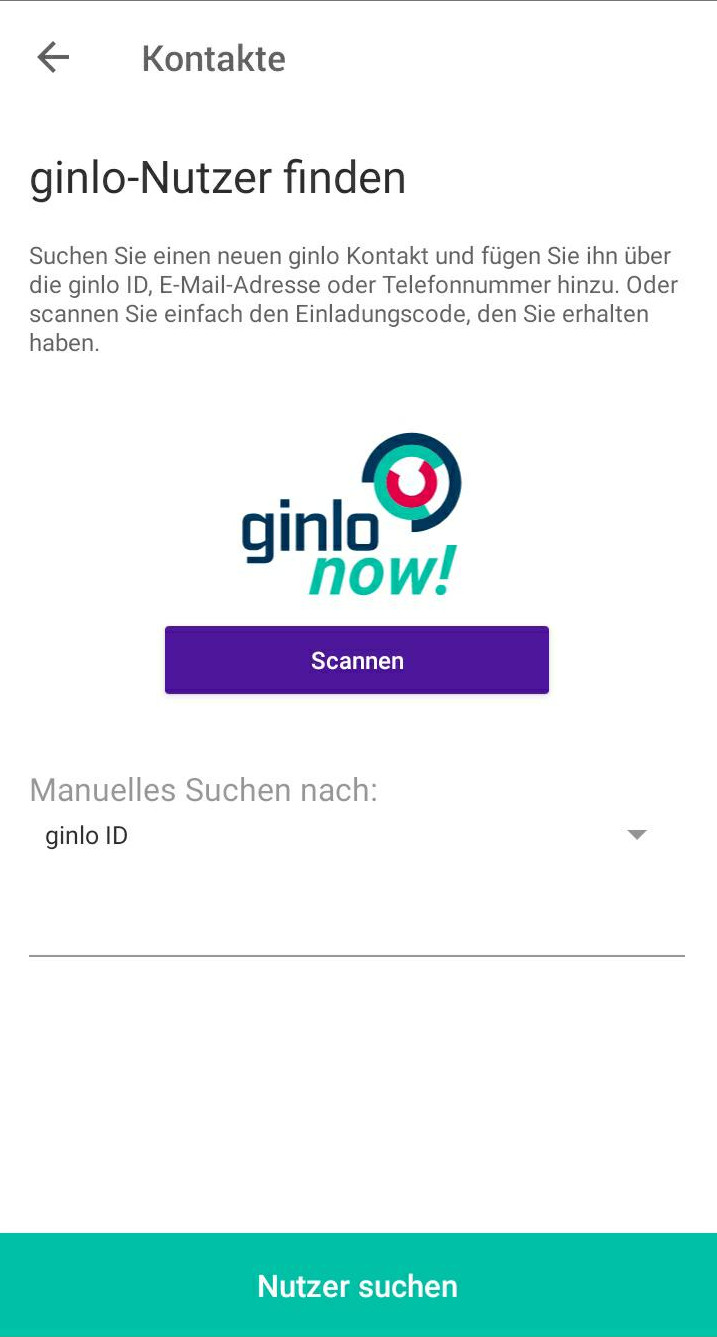
You have the option to scan a previously received QR code of your counterpart - this requires a second device. To do this, tap ginlo now!.
The QR code contains the ginlo ID. This will be transferred to your ginlo contacts when you scan it, and you can start chatting immediately.
Alternatively, you can search for a ginlo ID, email address or cell phone number. To select, tap on the arrow in the right margin.
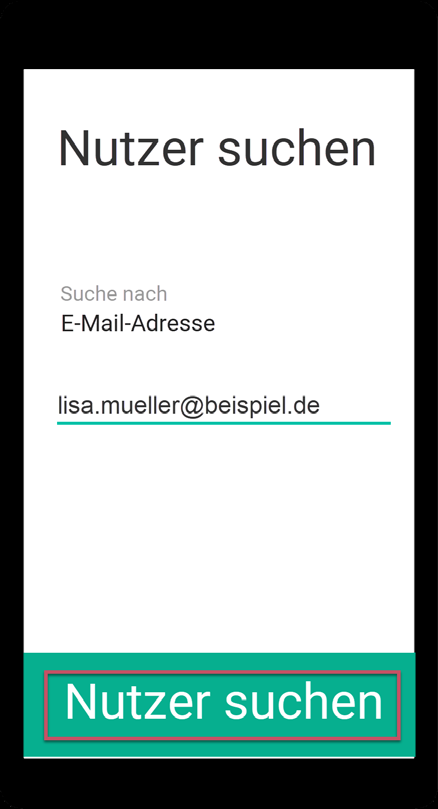
Then enter the data you are looking for and tap Search user at the bottom of the screen.
In case of a hit, the contact will be displayed to you. Now you can optionally add personal data of your contact. Save the record by tapping save contact at the bottom of the screen.
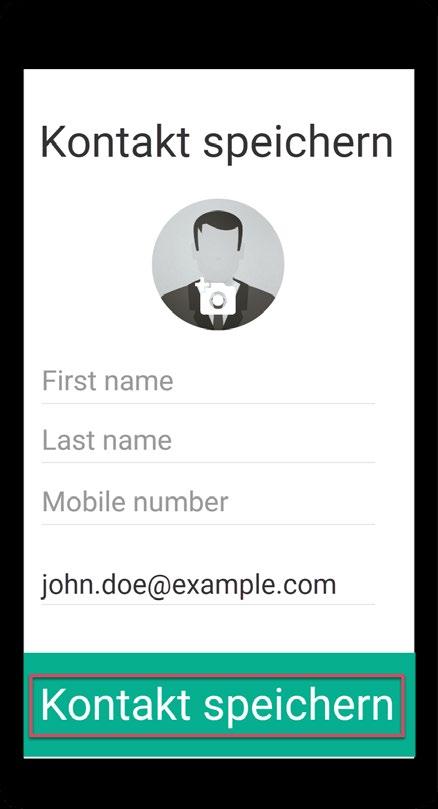
The chat window will open and you can start your Chat.
5.1.4.2. Search function
You can also search for existing contacts. Tap into the blank field with the magnifying glass. Enter the first letters of the contact you are looking for from your address book. A short time later you will be shown a selection. Now select the contact you want to chat with.
Alternatively, click the arrow in the upper left corner to return to your contacts.
5.1.4.3. Three dots
Inviting contacts from your local address book, searching for ginlo users and synchronizing with your local contacts can be found by tapping on the 3 dots at the top right of the magnifying glass.
A selection menu will open at the top.
5.1.4.3.1. Invite contacts
A messenger is only really fun when all friends and colleagues also use it. Therefore, invite all the people you want to communicate with securely via ginlo today:
Tap Invite contacts to invite other people to use ginlo. Choose a suitable app from those displayed to send the invitation. If your acquaintance accepts the invitation, you can immediately communicate with them via ginlo.
5.1.4.3.2. Search user
Tap on Search user. You will be taken to Find ginlo users.
5.1.4.3.3. Synchronize address book
With this function you match your local address book with your ginlo contacts. New contacts will be added automatically.
Hint
Check regularly if there are new contacts. To do this, tap on synchronize address book or simply drag the page with your contacts downwards.
5.1.4.4. Manage contacts
Tap on the contact you want to manage. The profile of the contact will open.
All ginlo users can immediately start an Audio Video Call, edit the contact, mute the chat, block or delete the contact and send a message in this menu.
ginlo Private users can additionally scan the QR code of their partner.
Similar to your own profile, you can edit your chat partner’s profile. To do so, tap on the pencil in the upper right corner.
Now you can create your own avatar, edit the surname and first name, correct the mobile number or add the email address.
You will also see the ginlo ID and the account status.
In the lower area you can mute the chat as well as delete or block the contact, send a message or scan the contact.
Tap the hook in the upper right corner to save your changes. Tap the arrow in the upper left to go back.
Hint
ginlo Business users may not be able to make changes, it depends on your administrator settings.
5.1.4.4.1. Mute
Sometimes you do not want to be disturbed by acoustic notifications and can therefore mute each chat individually.
To do this, tap Mute - a new page will open. Select from the list
15 minutes
1 hour
8 hours
24 hours
Until deactivation
The remaining time is displayed in the menu.
By tapping mute again, you can unmute at the bottom of the screen.
5.1.4.4.2. Block
There are good reasons to block one of your contacts temporarily or even permanently. During this time he can’t communicate with you - but you can’t write to him either! Tap block.
To unblock, tap unblock at the bottom of the screen.
5.1.4.4.3. Delete
Tap delete to delete the contact. A pop-up will ask you to confirm this operation. At this point you can also revise your decision - tap cancel.
5.1.4.4.4. Send message
Tap send message to go immediately to Single chat.
5.1.4.4.5. Scan contact
The fastest and safest way to add a contact to ginlo is to scan them.
To do this, your counterpart must call up their ginlo profile and provide you with their QR code. Tap on Scan and hold the camera of your device over the QR code to be scanned. In a flash, all the data is copied and available to you in your contacts.
Hint
ginlo Business users can use this function only with the permission of the administrator.
The arrow at the top left takes you back to the overview of your contacts.
5.1.5. Devices
It shows all your linked devices that have ginlo installed and kept in sync. You can use a maximum of three and in ginlo Business 10 devices at the same time.
In detail, the device name, the ginlo software used on it and the date of last use are displayed. Your currently used device is marked with This device.
You can give each paired device an individual name. Simply overwrite the displayed name and confirm your change with Save at the bottom screen.
Remove devices that are no longer in use by tapping the entry in question and then tapping delete device. You will be prompted to enter the device password of your current device.
To add a new device, proceed as described in Second device.
5.1.6. Settings
This menu takes you to additional settings with the following submenus:
5.1.6.1. Backup
A backup is a copy of your chats, files and contacts. This copy is stored encrypted outside the ginlo app.
If you switch to a new smartphone with the same operating system, then a backup is the only way to take your existing content with you and restore it on the new device.
Important
Backups can currently only be created in the mobile app.
They can only be imported on a smartphone with the same operating system, so only from Android smartphone to Android smartphone.
Depending on how old your last backup is, content may still be lost, but not as much as without a backup!
We recommend to additionally store a copy of your backup outside your phone, e.g. on your computer. We explain how this works in section Save backup externally.
Hint
External storage of your backup is especially important if you use several devices synchronously and your first device is to be replaced, e.g. due to a new purchase.
If you have not created a backup in this case, only the contents of your second devices that are not older than 30 (ginlo Private) or 90 days (ginlo Business) will be transferred when pairing your new device.
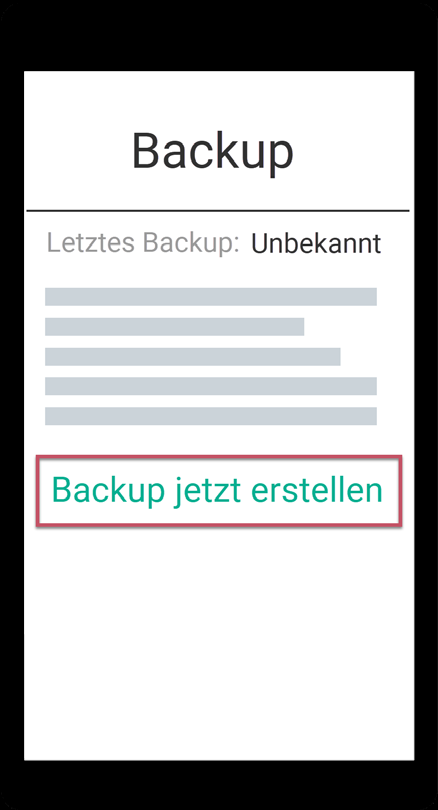
The date and time of the last backup creation are displayed in the upper right corner of this menu.
5.1.6.1.1. Create backup
Tap create backup now.
Please give the app access to your files as your backup will be stored on your device.
When creating a backup for the first time, you now assign a backup password and confirm it on the following screen.
Note
This password will encrypt your backup before it is stored locally on your device. You will need this password later to import your backup to a new device.

You will now be prompted to select a file name and location for your backup copies. This selection will be saved. By default ginlo-backup-Your ginloID.zip is suggested - you can name the file name however you like.
Click on Save.
When the file is complete, you will get the message Your backup is ready. Additionally the complete file name will be displayed again. Confirm with ok.
You can change your backup password at any time. With this password the next backup file will be encrypted.
In the future your backup file will be updated automatically in regular intervals. You can set the interval yourself:
off
daily
weekly
monthly
We recommend the default setting once a week.
Hint
An automatic backup only starts when the ginlo app is actively used, i.e. it is not created automatically in the background when the app is closed!
You can determine whether during the creation of a backup, in addition to your chats, the received media should also be backed up. To do this, press the button in the right margin.
Important
The backup is not available until the timestamp is displayed.
5.1.6.1.2. Save backup externally
On Android, your backup is stored locally. Therefore, copy it to a location outside your smartphone as well.
This is necessary so that you can transfer the backup to a new smartphone more easily later.
Important
It is best to do this regularly. Then you will always have a current backup ready in case your smartphone gets lost.
This is how you save your backup outside your smartphone:.
Connect your smartphone to your computer.
Note
On macOS, please install the AndroidFileTransfer <https://www.android.com/filetransfer/> application for this.
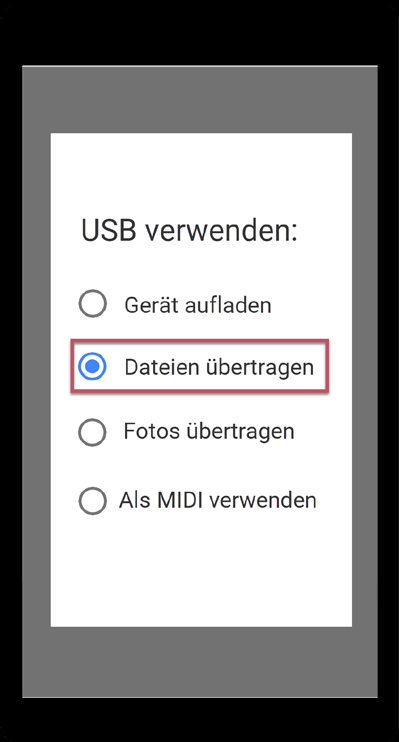
On your smartphone, you may need to allow file transfer. To do this, swipe down on the screen of your smartphone once you have connected it to the computer and tap Transfer files.
On your computer, open the device folder that appears for your smartphone and look for the ginlo folder.
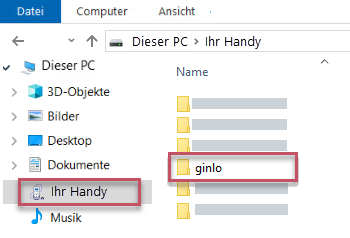
Copy the entire folder, for example, to your computer’s hard drive, to an external drive, or to secure cloud storage.
Note
Wherever you copy your backup to - it is protected with the backup password you assigned in the app.
5.1.6.1.3. Import backup
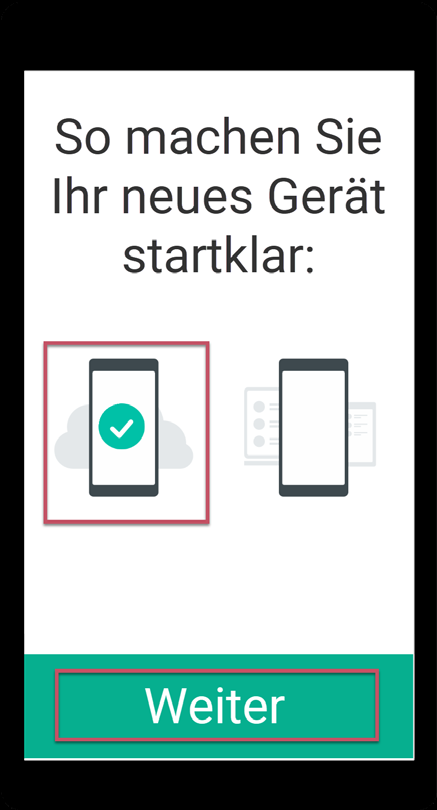
Install the ginlo app and proceed as described in ginlo Private install and initial setup.
Tap Let’s go and then unconditionally select I already have an account.
Tap on import backup and confirm.
Assign a device password and click next, confirm your device password and press next again.
With this device password all your ginlo content will be encrypted. Remember this password well!
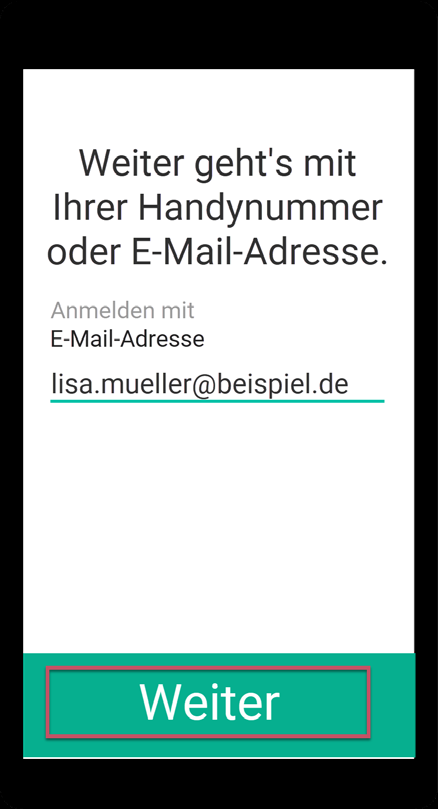
Now enter your registered cell phone number (without leading zero) or your email address. (This data will be used in plain text only for sending the confirmation code and will be encrypted afterwards and stored in our database not reproducible for anyone).
A window will pop up All correct like this? - you can still make corrections or confirm the entry with Looks good.
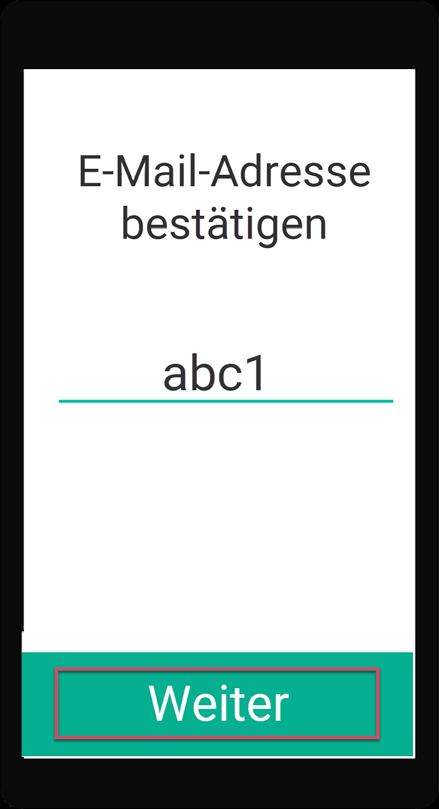
Enter the confirmation code you received via SMS or email and press next.
If everything has run without errors up to this point, you should now see the message Wonderful, we found your backup.
Select the backup and tap on import backup. Your selection will be confirmed with a colored check mark. To do this, you may need to allow ginlo to access your files.
Enter the backup password that you assigned when you created the backup.


Your contacts and chats will now be imported. Depending on how old your backup is, you can pick up chatting (almost) exactly where you left off on your old device.
Note
After importing a backup, you should create a new backup on your new device!
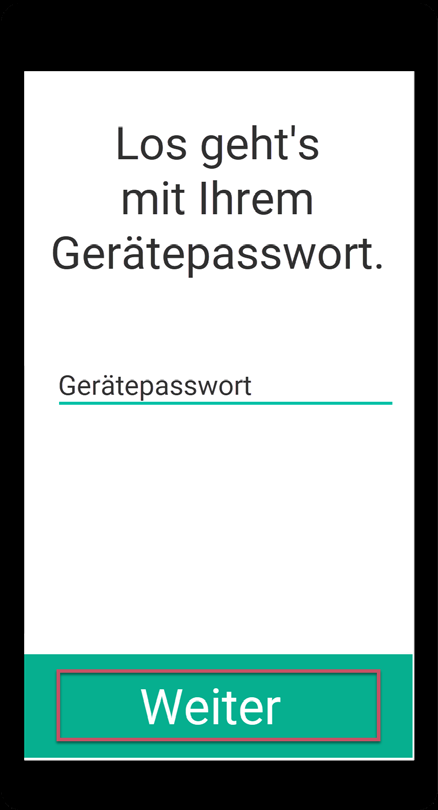
5.1.6.2. Password
At ginlo, we refer to the password as the device password, which secures your ginlo account on the various devices. Since ginlo can be used on multiple devices in the business sector, a device password must be assigned for each device.
Device password is used to encrypt all ginlo content on the respective device. Private key generated in the process is always located only on the device in question - no one but you has access to it!
In this menu you can change your current device password, define if it should be requested at every ginlo start and if your content should be deleted after a certain number of wrong entries for security reasons.
To enter the password menu, you will be asked for your current device password for security reasons.
If you have forgotten your password, read here.
5.1.6.2.1. Change password
Tap on change password.
Enter a new password that you will use to log in to your ginlo account in the future and that will later be used to encrypt all contents of your account.
Your device password should consist of at least 8 upper and lower case letters, numbers and special characters. You can see how secure your chosen device password is by the colored dots: All green? That’s perfect!
Tap next and confirm your new password on the following page and tap next again. If both entries match, you will briefly see Password has been changed and return to the settings. Now tap OK, which will take you back to the menu.
Warning
If your two entries are not identical, you will get this error and the sentence Passwords do not match.
First tap on OK and then on the arrow in the upper left corner! This will take you to the first (!) input page and you can enter your new password again at your leisure. Then proceed as described above.
5.1.6.2.2. Change PIN
If you would rather use a 4-digit PIN instead of the complex password, move the switch to the right.
Assign a new PIN with which you will log in to your ginlo account in the future and with which all contents of your account will be encrypted later.
Your device code consists of only four digits - think carefully about your decision!
After entering your PIN, please confirm it again. Tap next at the bottom of the screen and confirm your new PIN on the following page. If both entries match, tap next again and Password has been changed will be displayed. You will return to the settings menu.
Warning
If your two entries are not identical, you will see this error and the sentence PINs do not match will appear.
First tap on OK and then on the arrow in the upper left corner! This will take you to the first (!) input page and you can assign your new PIN again at your leisure. Then proceed as described above.
5.1.6.2.3. Request password
If you want to enter your device password again every time you start the app for security reasons, move the switch to the right.
Now you can define within which time the password request should occur:
immediately
after 1 minute
after 5 minutes
after 10 minutes
Tap on desired entry.
Warning
In case of password loss, recovery is not possible. petrol:ginlo Private users have to reset their account and create a new one - all data will be deleted! petrol:ginlo Business users read more about this topic under Recovery code.
5.1.6.2.4. Delete data
In order to protect your ginlo account in case of misuse of your smartphone or in case of its loss, you can define after which number of failed attempts your ginlo data should be deleted.
To do this, move the switch to the right. Now you can set the number of attempts between 1 and 10. Confirm your selection with OK.
Exit this submenu by tapping the arrow at the top left.
5.1.6.2.5. Recovery code (B)
If you are a ginlo Business user and have forgotten your password, you can have a recovery code sent to your stored contact details. To do this, enter any password and tap on Send recovery code. Follow the further instructions.
5.1.6.3. Privacy
Here you can make some settings to protect your privacy.
5.1.6.3.1. Status
Also at this point you can change your current status - read Avatar - Profile.
5.1.6.3.2. Contacts
If you have contacts from your address book blocked, their number is shown here. Tap on an entry to unblock this blocked contact.
5.1.6.3.3. Chat
Under this item you set whether your counterpart should receive a Read confirmation or whether your Online status should be displayed. To do this, press the relevant buttons.
5.1.6.3.4. Messages
Load messages in background
If new messages are signaled and ginlo is only running in the background on your phone, you can use this switch to instruct ginlo to fetch the messages from the server immediately.
Messages available on server (B)
As a hint you can see here how long your messages are available on our servers for synchronization. The number of days can be set by your administrator.
Send display name for messages
Here you can decide whether the name you specified during registration should be displayed or not.
5.1.6.3.5. Error analysis
ginlo works very reliably. Nevertheless, it can happen that the app closes unexpectedly. This is annoying, but can have a variety of reasons. In order to inform our developers about this event, so that they can track down and eliminate possible errors, a crash report is generated in such a case, which contains only technical data.
We therefore ask for your support and would be pleased if you would turn on this button. By doing so you contribute to the stability of ginlo - thank you!
Hint
The crash report does not contain personal data or any chat content!
5.1.6.4. Chats
In this section you can make settings related to your chats.
5.1.6.4.1. Media
Media quality
Here you can set the quality (resolution) of your sent images or videos. Tapping the area will take you to the settings. You have the option to select one of four quality levels:
Low
Medium
High
Very High
Confirm your selection with OK.
Hint
Keep in mind that as the quality increases, so does the size of your file!
Back up media automatically
After short tap received media can be automatically saved in the gallery of your device, i.e. they are saved locally on your device. To do this, press the button on the right edge of the screen.
Open files externally
To open files usually external programs installed on your smartphone are used. Thus, this file leaves the protected ginlo area. You will receive a corresponding warning. This warning can be switched off. To do so, press the button on the right edge of the screen.
Show sticker
If you want to see received stickers (moving images or animations) immediately, leave the switch on. In “Off” mode, stickers are only displayed as still images, but can also be displayed moving by short tap.
Animations in [file].tgs format are also supported.
5.1.6.4.2. Background
You can change the set white background and load a chat background image. You can choose from our templates or a photo from your albums. To do this, tap either backgrounds or select image.
Tap on the selected image and confirm by tapping on the checkmark in the upper right corner. Your selection will be applied and you will return to the chat menu. Tap again chat background image, you can reset the process.
You can get a neutral (white) background by selecting the image on the top left.
We have described how to switch to darkmode in this chapter.
5.1.6.4.3. Sounds
In this section you set whether you want to be informed acoustically about receiving or sending messages. The following options are available for this purpose:
Play sound at self-destruction.
Play sound when sending
Play sound when receiving
Press the corresponding button on the right side of the screen.
5.1.6.5. Media Auto Download
To conserve Internet resources, you can specify here the conditions under which the download of your received files should take place. The setting is possible separately for photos, audio files, videos or other files (e.g. documents). Per file type you can choose between:
WLAN & Mobile Data
WLAN
never
Confirm your selection with OK.
At the bottom of the screen is the Reset Settings button. This will apply the following settings:
Photos - WLAN & Mobile Data
Audio - WLAN
Videos - WLAN
Files - WLAN
Stickers are downloaded immediately when the switch is set to On.
Tapping the arrow at the top left will return you to the menu.
5.1.6.6. Notifications
In this section you can set the audible notification for incoming individual, group or channel messages.
You can also specify whether to display in-app messages or show the preview of incoming messages.
5.1.6.6.1. Messages for chats
You can generally turn on or off the notification for individual chats.
To do so, press the buttons on the right edge of the screen.
5.1.6.6.2. Messages for groups
You can generally switch the notification for group messages on or off.
To do so, press the buttons on the right side of the screen.
5.1.6.6.3. Messages for channels
You can generally switch the notification for subscribed channels on or off.
To do so, press the buttons on the right side of the screen.
5.1.6.6.4. Other
You can define whether in-app messages should be displayed or a preview of incoming messages should be shown. To do this, press the buttons on the right edge of the screen.
By tapping the arrow at the top left you return to the menu.
5.1.6.7. Appearance
In this menu you can switch to Darkmode and change the Font size.
5.1.6.7.1. Screen design
To save your eyes and also the battery of your device, you can activate the Darkmode. In dark mode, you will see a light font on a dark background.
To do this, tap on Screen design. You can choose between Light, Dark and Auto. In Auto mode, the display is adapted to the basic setting of your smartphone (Darkmode on or off).
Hint
If your ginlo administrator has made appropriate settings, ginlo Business users may not be able to use this feature and it will be disabled automatically!
How to change the chat background we have described in this chapter.
5.1.6.7.2. Theme (experimental)
In this section you can change the font size. Currently you can choose between Default, Small Font and Large Font.
The default setting takes into account the basic setting on your smartphone.
Additionally, you can make the font smaller or larger to display more or less content on your screen.
Hint
This area is currently being worked on. A result will be presented soon.
5.1.6.7.3. Enhanced
Here you can access further setting options for your account:
You can allow taking screenshots, select a Google free location service, completely disable the use of Google services, and enable a regular connection to the ginlo server for instant notifications.
5.1.6.7.4. Image contents
On explicit request screenshots can be created in the ginlo app. Normally this feature is disabled for security reasons. Press the button on the right edge of the screen to turn it on. After that a restart of the ginlo app is required!
5.1.6.7.5. Site Service
As an alternative to the default Google service, you can use OpenStreetMaps as a location service.
To do so, press the button.
In closed rooms or under unfavorable conditions the display of the selected location may take a little longer than usual - have a little patience!
Hint
The following point is only displayed in Google free versions!
5.1.6.7.6. Google FCM / Play Services
If you have ginlo without installing Google services from our website, the switch in this submenu must be set to Off!
5.1.6.7.7. Message Polling
To ensure that you can still be informed immediately about incoming messages, turn on Message Polling.
This setting can be accompanied by a slightly increased battery consumption.
Additionally, the ginlo icon will be permanently displayed in the notification bar of your phone.
Hint
However, when using Playstore versions, this switch should be set to Off!
5.1.7. Help
In this section we give hints on support options, direct you to our privacy policy, terms of use (P) or GTC (B), give an overview of the licensed software we use and show our imprint.
5.1.7.1. Manual
You can access this manual ginlo manual directly from the app in your web browser.
5.1.7.2. Get support
Customer satisfaction is very important to us. We welcome your inquiries, comments or constructive criticism.
In addition to this manual, you can also get individual support:
5.1.7.2.1. Contact customer service
ginlo Private users
Use our B2C Support Form, select ginlo Private and click on Contact at the bottom of the page or write to support@ginlo.net .
ginlo Business users
Use our B2B Support Form, select ginlo Business and click on Contact at the bottom of the page or write to b2b-support@ginlo.net .
5.1.7.2.2. Send log file
In certain cases, you may be asked by our support to send log file. In this log file our developers can find e.g. hints about inconsistencies of the ginlo app. By sending us your log file, you help to improve the ginlo app.
Log file contains technical data about the app, device used and actions performed.
Hint
Excluded is transmission of personal data; this of course includes your communication content!
Your log file is sent by email via account you use on your device.
To do this, simply tap on the link Send log file now and select an app for sending. Optionally, you can leave a comment, e.g. a ticket number already assigned.
5.1.7.3. About ginlo
The following explains some points about security of your communication.
5.1.7.3.1. Encryption in ginlo
ginlo encrypts all your messages on your devices, during transport and on the receiving devices. That’s why we rightly talk about actual full encryption. The private keys for this are generated automatically by each user himself with the assignment of a device password per end device. Since these keys are only located on the device of the respective user, neither ginlo.net GmbH nor any third party has access to them.
Of course, we offer a number of other features to make your communication as secure as possible:
5.1.7.3.2. This is how secure your communication is
Depending on how you and your chat partners have exchanged your contacts, your chats in the overview and your address book entries are marked with a color code on the left side of the screen.
Green
All contacts are marked that are very safe - you have met in person and exchanged your QR codes or were invited by the administrator (B).
Yellow / Orange
All contacts are marked that have already been communicated with several times.
Red
All contacts are marked with which no communication has been made yet - ask or send an invitation!
In the chats, you will also find this marking as a colored square at the bottom right of the relevant avatar.
The account type of your counterpart is also displayed there; however, only if your communication partner uses a different account type than you do.
For example, if you use ginlo Private and communicate with a ginlo Business user, this will be displayed below his avatar - BUSINESS. The same applies vice versa - PRIVATE.
5.1.7.3.3. Transmission status
So that you also know whether your message has been sent, has arrived on the target device and has been read, your messages are marked with small gray or blue check marks. This has the following meaning:
1 gray tick
The message has been sent and has arrived on the ginlo servers.
2 gray ticks
The message has been transferred to the recipient and has arrived there.
2 blue ticks
The message has been read by all (!) recipients.
Hint
You get exact information about the status of each sent message if you tap a little longer on the sent message. Under Info the information is displayed exactly.
5.1.7.4. Privacy policy
Compliance with data protection is an absolute priority at ginlo.net GmbH. We therefore collect a minimum of personal data and attach great importance to secure communication in order to protect your privacy.
You can read about how we handle your data in detail and what security precautions we take in the process, as well as what rights you have in the processing of your data, in our Data Protection Notice. If you have any questions, please feel free to contact us by e-mail at Datenschutz@ginlo.net .
5.1.7.5. Terms of use (P)
In our Terms of Use you will find important information on the contractual terms, rights and obligations, warranty, liability and term of the contract in connection with the use of the ginlo Private app. If you have any questions, please feel free to contact us by email at kontakt@ginlo.net .
5.1.7.6. Terms and Conditions (B)
In our General Terms and Conditions (GT&C) you will find important information about the terms of the contract, rights and obligations, warranty, liability and term of the contract in connection with the use of the ginlo Business app. If you have any questions, please feel free to contact us by email at contact@ginlo.net .
5.1.7.7. Licenses
ginlo also uses copyrighted software, fonts, characters, etc. to provide the service and lists them under licenses.
5.1.7.8. Imprint
In imprint you will find all necessary information about the operator of ginlo website.
5.1.8. Release Notes
If a new ginlo version is available, the (i) is displayed in color.
Your currently used ginlo version is displayed at the bottom of the screen. This information is important if you want to contact our support department.
Tap on the (i) to go to the overview of the latest versions.
Hint
Make sure that you always use a current ginlo version.
The reason for this is on the one hand the security aspect and on the other hand the fact that you can only use the latest ginlo features with up-to-date software.
5.2. Menue „+“
You can find this menu item in your chat overview at the bottom right. A submenu will open where you can organize your chats:
5.2.1. New chat
Tap New Chat, your ginlo contacts will open. Use the search function or select a contact directly. You can find more explanations about the input options in In Chat.
Now you can compose your message.
5.2.2. New distributor
This feature gives you the ability to once send a specific message to multiple chat participants who are not in a Group.
Tap on new distribution list - your ginlo contacts will open. Now tap on the contacts you want to send a message to. Your selection will cause a white checkmark to appear in contact’s avatar. Tapping a contact again will cancel this selection. Confirm your selection by tapping the hook at the top right of contacts.
You can delete contacts or add more by tapping the person in the top right corner. This will take you back to your contacts. Confirm your change by tapping the hook in the top right again.
Now you can compose your message. After that, checkmark will be removed from your contacts.
5.2.3. New group
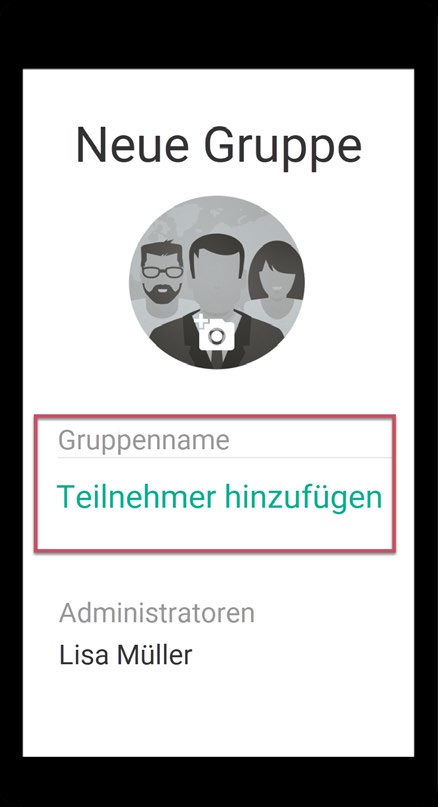
If you want to communicate in a group, you must first create a group. To do this, first tap the + at the bottom right in the chat overview and then on new group - overview page for managing groups will open.
Optionally choose an avatar.
Assign a group name.
Make sure that announcement group has the switch set to no.
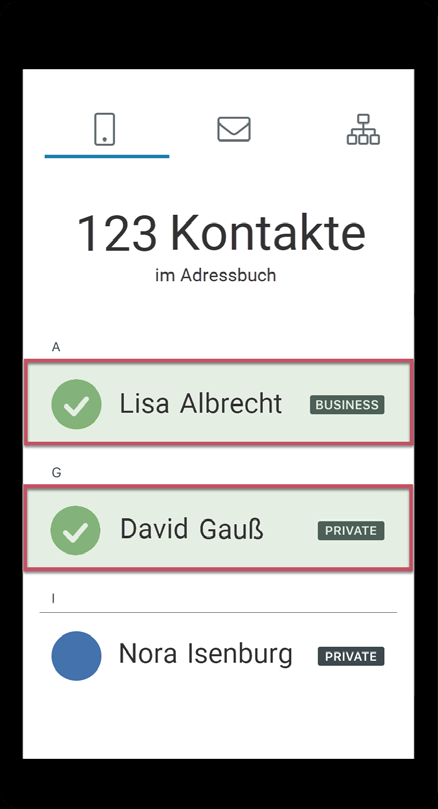
Tap on add participants - your ginlo contacts will open. Now tap on the contacts you want to add to the group. Your selection will cause a white checkmark to appear in the contact’s avatar. Tapping a contact again will cancel this selection. Confirm your selection by tapping the hook in the upper right corner.
You can remove group members by tapping on remove participant and then on the contact you want to remove. To confirm, the avatar will be displayed as a red dot with a white cross. Confirm your change by tapping the checkmark in the upper right corner again.
Optionally, you can designate additional administrators. To do this, tap on manage administrators. The list of your group members will be displayed. Now tap on the contacts you want to set as administrators. Your selection will cause a white checkmark to appear in the contact’s avatar. Confirm your selection by tapping the hook in the upper right corner.
You can delete administrators by tapping manage administrators again. To confirm, the white tick in the avatar will disappear. Confirm your change by tapping the hook in the upper right corner again.
Hint
Administrators you designate can invite or delete other group members, but they cannot add administrators.
Finally, tap Done in the upper right corner.

Now you can compose your message. All participants will receive invitations and can join your group.
If you want to leave a group as a member, select the respective group chat in the Chat overview and tap on the group name. At the bottom of the screen you will find the Exit Group button. In another pop-up you will be asked for confirmation or you can cancel the process.
If a group is no longer needed, select as an administrator in the Chat overview the relevant group chat tap and on the group name.At the bottom of the screen you will find the button Delete group. In another pop-up you will be asked for confirmation or you can cancel the process.
5.2.4. Announcement group (B)
In contrast to the group described above, here you have the possibility to send information to your group members without them being able to reply to it. You can give administrator rights to certain group members so that they can also write and add or remove other members.
Hint
The creation of such groups is only available to ginlo Business users. However, ginlo Private users can also be invited and even appointed as administrators.
To create an announcement group, tap the + in the bottom right corner of the chat overview and then tap new group - overview page for managing groups will open.
Optionally choose an avatar.
Assign a group name.
Make sure that announcement group has the switch set to yes.
Tap on Add participants - your ginlo contacts will open. Now tap on the contacts you want to add to the group. Your selection will cause a white checkmark to appear in the contact’s avatar. Tapping a contact again will cancel this selection. Confirm your selection by tapping the hook in the upper right corner.
You can remove group members by tapping on remove participant and then on the contact you want to remove. To confirm, the avatar will be displayed as a red dot with a white cross. Confirm your change by tapping the checkmark in the top right corner again.
Optionally, you can designate additional administrators. To do so, tap on manage administrators. The list of your group members will be displayed. Now tap on the contacts you want to set as administrators. Your selection will cause a white checkmark to appear in the contact’s avatar. Confirm your selection by tapping the hook in the upper right corner.
You can remove administrators by tapping on manage administrators again. To confirm, the green checkmark in the avatar will disappear. Confirm your change by tapping the hook in the upper right again.
Hint
Your designated administrators can invite or delete other group members, they can even add or delete administrators.
Finally, tap Done on the top right.
Now you can compose your message. All participants will receive invitations and can join your announcement group.
If you want to leave a group as a member, select the respective group chat in the Chat overview and tap on the group name. At the bottom of the screen you will find the Exit Group button. In another pop-up you will be asked for confirmation or you can cancel the process.
If an announcement group is no longer needed, tap on the group name in the Chat Overview and then tap on delete group at the bottom. A pop-up will ask you to confirm this action. At this point you can also revise your decision - tap Cancel.
5.2.5. Subscribe to channel (P)
From this menu you can also subscribe to channels.
5.2.6. Search users
From this menu you can also search users.
5.2.7. Invite (P)
From this menu you can also invite contacts.
5.4. Chat overview
Directly from the chat overview you can edit single and group chats and also channels (only for ginlo Private users).
By longer tapping on a chat a pop-up opens at the bottom of the screen with different options.
5.4.1. Single chat
You can clear the chat, (previously) export its content as a backup, or delete the chat completely.
Follow the further instructions.
5.4.2. Group chat
You can empty the chat, (previously) export its content as a backup or leave the group.
Follow the further instructions.
5.4.3. Channels (P)
You can empty or unsubscribe the chat.
Follow the further instructions.