2. Install ginlo Private and setup (P)
Installing, setting up and using ginlo is very easy and does not require any special skills.
When downloading, make sure you have a stable internet connection and enough free space on the device you are using.
2.1. Download ginlo Private
ginlo apps can be conveniently downloaded from the app store of your choice.
Note
Note the minimum requirements for the operating system of your smartphone:
Android: from version Android 5; use of audio-video chat is possible from Android 8.
iOS: from version iOS 12
2.1.1. ginlo now!

Much faster than described in the following sections you can use ginlo if you are invited by a ginlo user. To do this, scan the QR code of the inviter and tap on the link that appears. After downloading the ginlo app, you will immediately be taken to the chat overview and can get started right away.
The best thing about it:
In this case, registration takes place without entering a phone number, email address or other personal data!
This data can be added later if necessary.
2.1.2. Download for Android devices
Use the app Play Store on your phone and type ginlo in the search box. Select the app ginlo Private messenger and follow the installation instructions.
Symbolically, you can use this page as a guide.
For those who prefer to work without Google, we offer a way to do so in the download section of our website under GINLO PRIVATE. Additional instructions can be found here.
2.1.3. Download for iOS devices
Use the app App Store on your phone, select search and type ginlo in the search box. Select the app ginlo Private and follow the installation instructions.
Symbolically, you can use this page a way to do so.
2.2. Initial setup
Here’s how to set up your account for the first time after downloading the ginlo app.
Open the app and tap go-> create account.
Three installation options are displayed on the following screen:
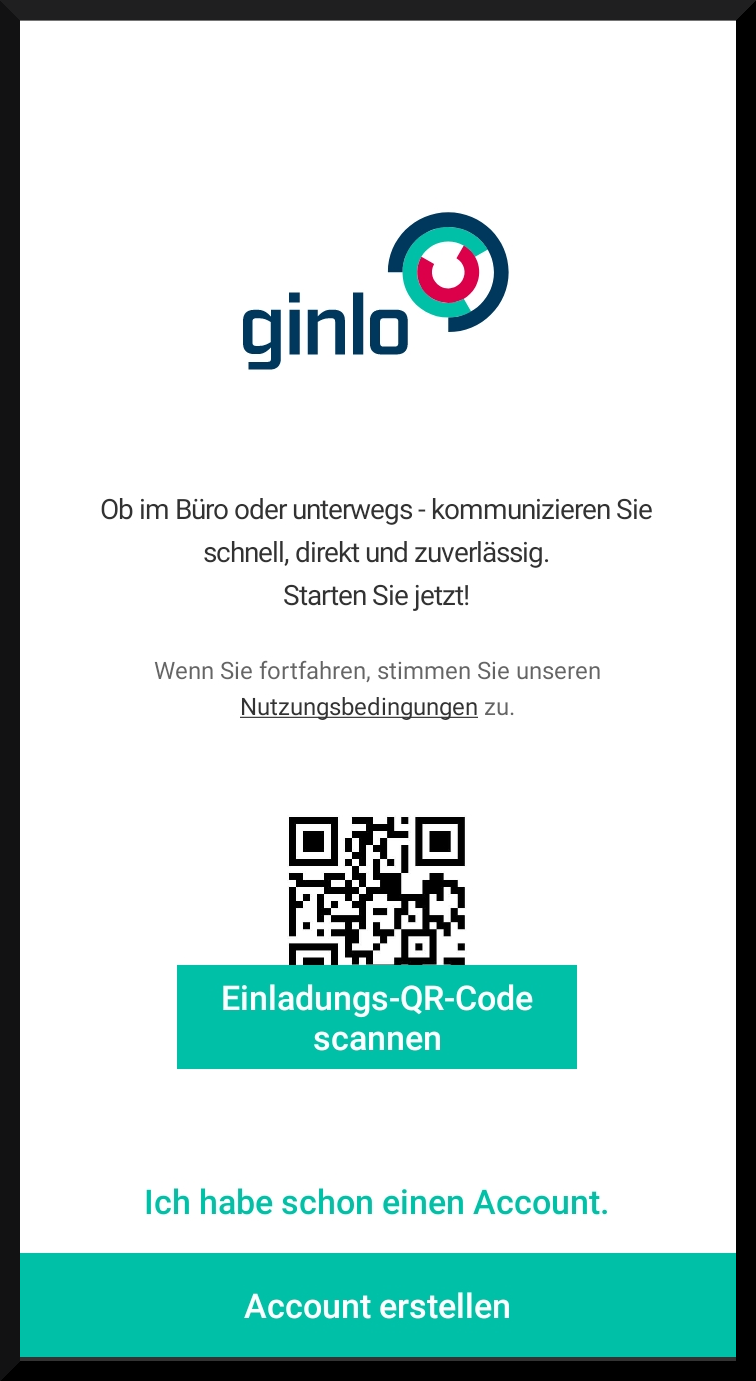
Scan invitation QR code
I already have an account.
Create account
2.2.1. Scan Invitation QR Code
To scan an invitation code, you need to give ginlo permission to create images or videos and file access.
After that, your installed scanner app will open. Point your smartphone camera at the invitation code.
Assign a password that you will use to log in to your ginlo account in the future and that will later be used to encrypt all the contents of your account. We call this password the device password.
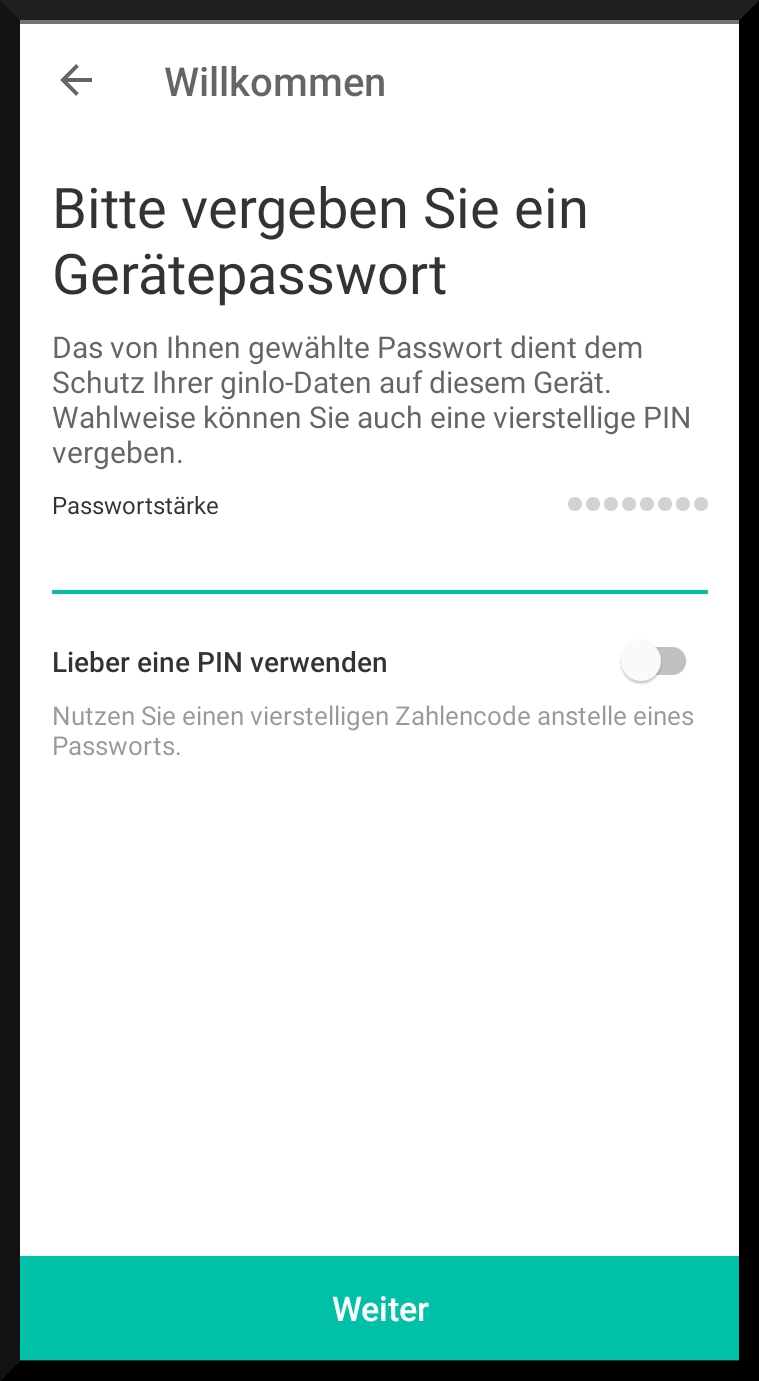
Your device password should consist of at least 8 upper and lower case letters, numbers as well as special characters. You can see how secure your chosen device password is by the colored dots: Everything in the “green area”? Great - you can continue!
Alternatively, you have the option of logging in with a four-digit PIN code. This is convenient, but at the expense of your security!
Tap on Set password and repeat your previously assigned device password on the following page - remember it well!
Now you can decide whether this device password should be requested every time you start the ginlo app.
Confirm your entry by tapping Confirm password.
… hint:
If the entries of your device password are not identical, you will get this as an error message. In this case, go back to the **first** page of the password entry and calmly start over!
You will get to your profile.
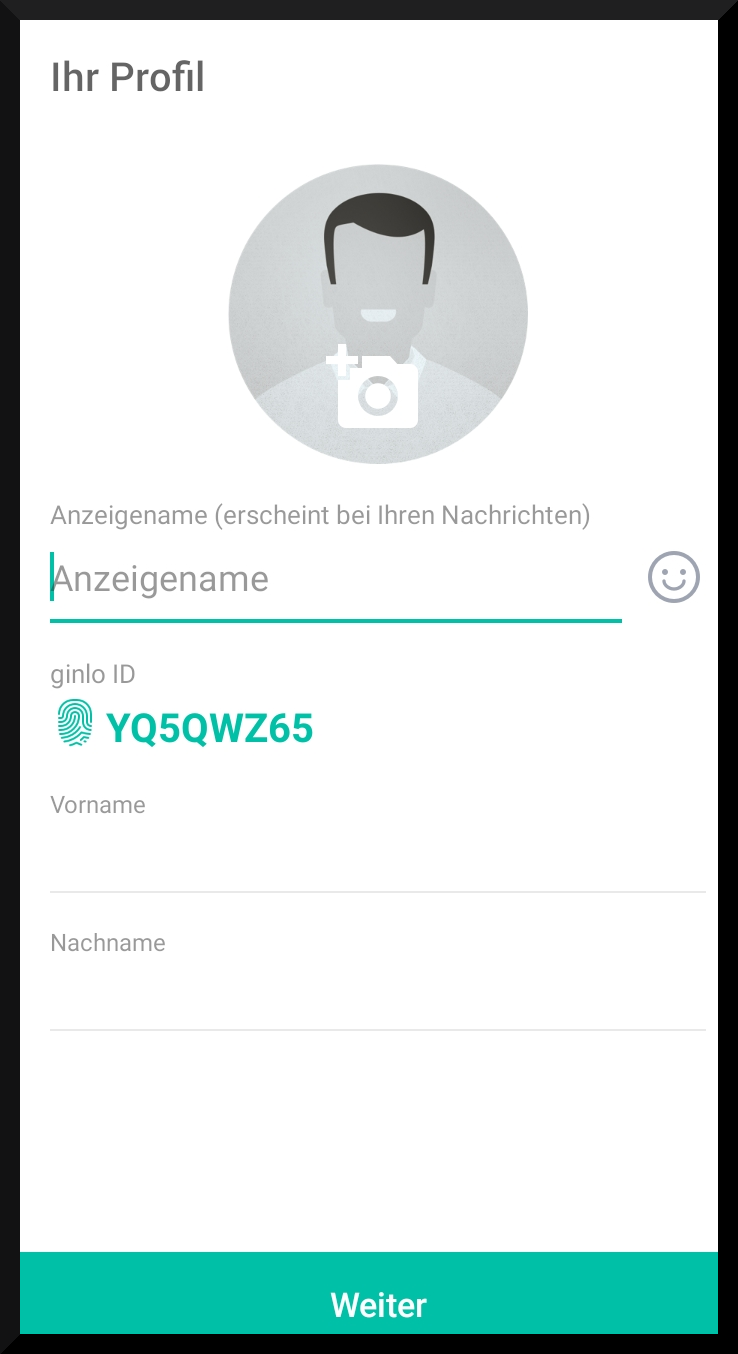
Next, assign a name to be displayed in your messages. Optionally, you can upload a photo that will be displayed as an avatar. After that, tap Next.
You can optionally add your first and last name.
Tap on Next.
You have received an invitation is displayed.
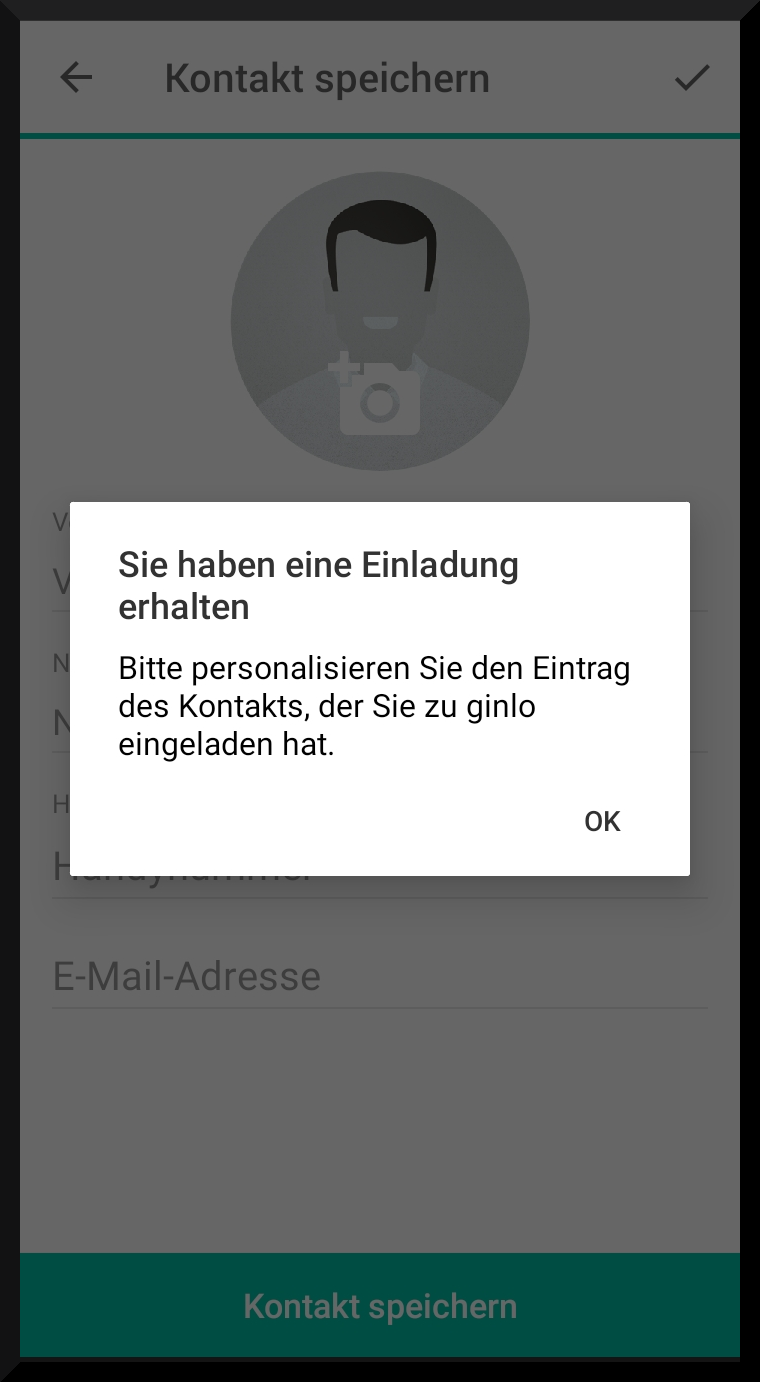
Tap ok.
You will be taken to the Contacts section.
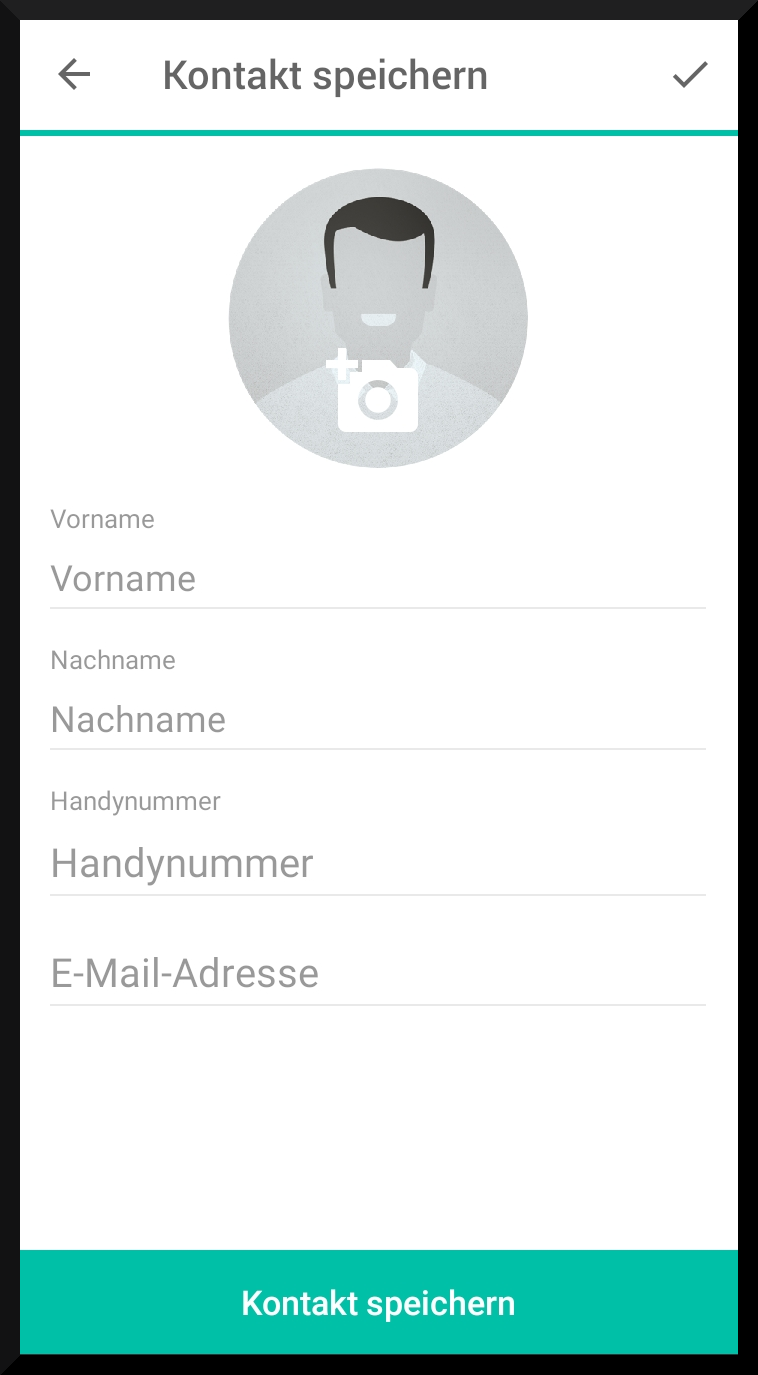
Optionally, enter the data in the displayed fields and tap Save contact*.
On the following screen you can correct your previously made entries by tapping on the pencil in the upper right corner.
Now your ginlo account is set up and you can start the first chat. To do so, tap on send message at the bottom of the screen.
2.2.2. I already have an account
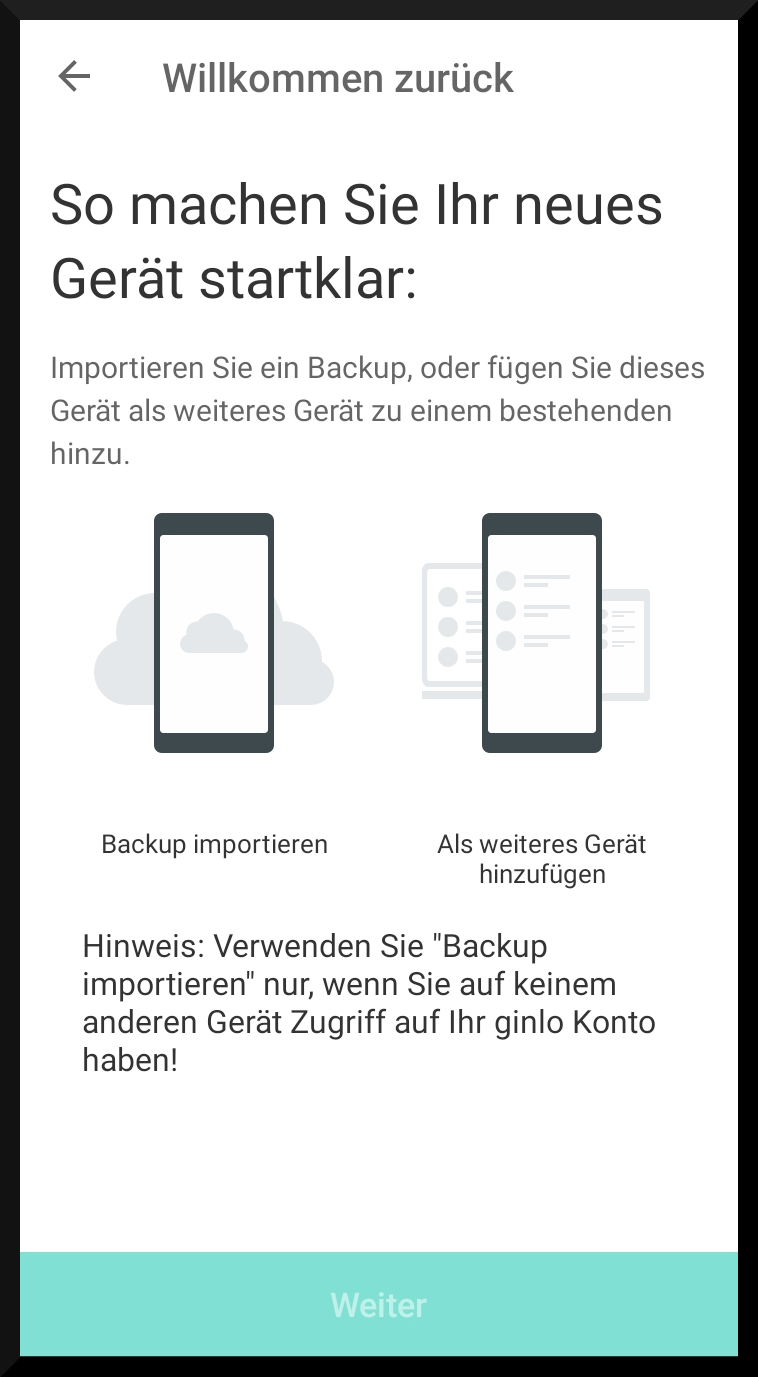
Select this option if you have already installed ginlo on this device and created a backup or if you want to use this device as a second device.
2.2.3. Create account
Assign a password that you will use to log in to your ginlo account in the future and that will later be used to encrypt all contents of your account. We call this password the device password.
Your device password should consist of at least 8 upper and lower case letters, numbers as well as special characters. You can see how secure your selected device password is from the colored dots: Everything in the “green area”? Great - you can continue!
Alternatively, you have the option of logging in with a four-digit PIN code. This is convenient, but at the expense of your security!
Tap on Set password and repeat your previously assigned device password on the following page - remember it well!
Now you can decide whether this device password should be requested every time you start the ginlo app.
Confirm your entry by tapping confirm password.Now tap set password and repeat your previously assigned device password on the following page - remember it well!
Hint
If the entries of your device password are not identical, this will be displayed as an error message. In this case, go back to the first page of the password entry and start again calmly!
Your ginlo ID will be displayed.
Tap Next
You will get to your profile.
Next, assign a name to be displayed in your messages. Optionally, you can upload a photo that will be displayed as an avatar. After that, tap Next.
You can also add your first and last name.
Tap Next.
Now you have the possibility to check if one of your contacts already has a ginlo account. This requires access to your local phonebook.
Note
The access to your address book is only needed for searching known contacts within ginlo. This data is never transmitted in plain text to us, other subscribers or third parties. Encrypted values are generated locally on your device, which are compared with the also encrypted values of other users. There is no access from outside your device to the clear text data at any time!
In order to be found yourself, please add your cell phone number in your profile, which will then be stored as a hash value on our server. The search is done as described above.
You will get to the Chats section.
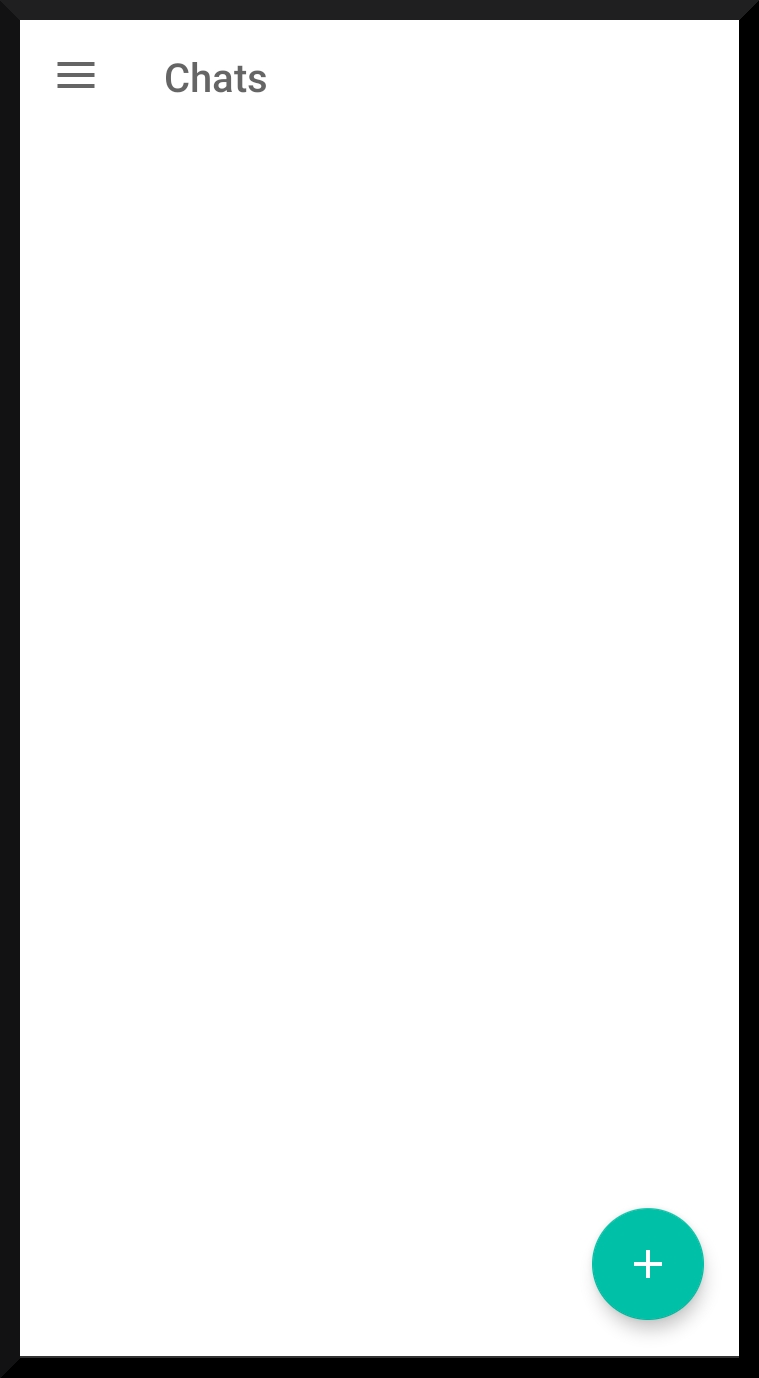
Tap on the + at the bottom right and then on New Chat.
You will be taken to the Contacts section. Select a contact, tap on it and you are ready to send your first message.
Your contact list is empty? Proceed as described in Search user for Android or in Search user for iOS.
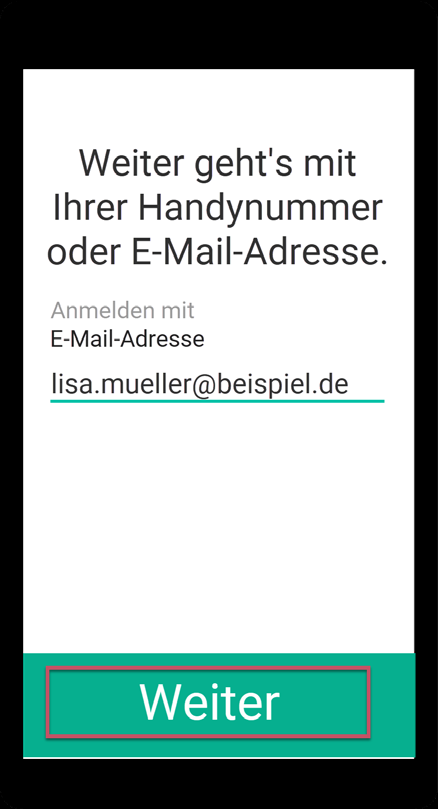
Enter your cell phone number. First select your country, default is Germany. The international dialing code is automatically applied. Enter your mobile number without leading zero and without special characters. Read through the Terms of Use and tap Agree and Continue. Review your entry and correct it if necessary. After that, tap Looks good.
Your cell phone number is stored encrypted as hash value in our database and can not be seen by us in plain text! The hash value of your number will later be used for matching during the contact search.
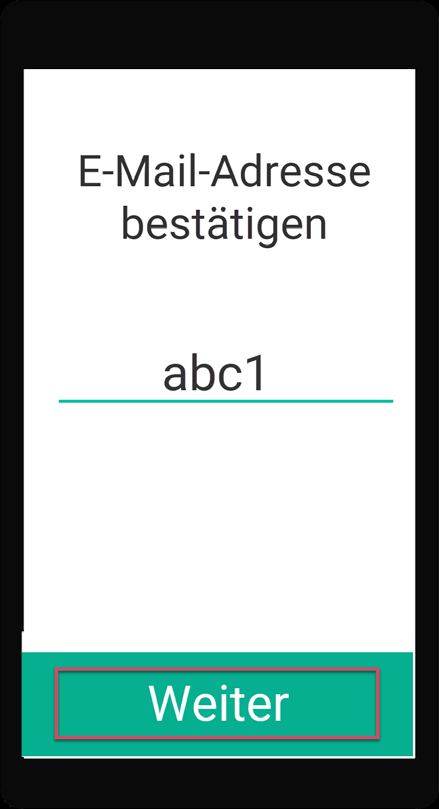
Now you will receive a confirmation code. Enter it in the provided fields and tap next.
Note
The code has a validity of 5 minutes. You can request another code after that.
If you do not receive a code, first check the notification settings on your smartphone. You are also welcome to contact our support department.
Click on ginlo Private and then on Contact at the bottom of the page. The support form will open. Select ginlo Private and fill in the remaining fields.
If you have ginlo Private already installed once and made a backup, you can now import the backup and use ginlo as usual. Please read further in Tips & Tricks under Import backup.
If you are a first-time user of the ginlo app, tap on create new account. However, this will overwrite any account data that may have been previously saved under this mobile number! Importing a previously saved backup is then no longer possible.
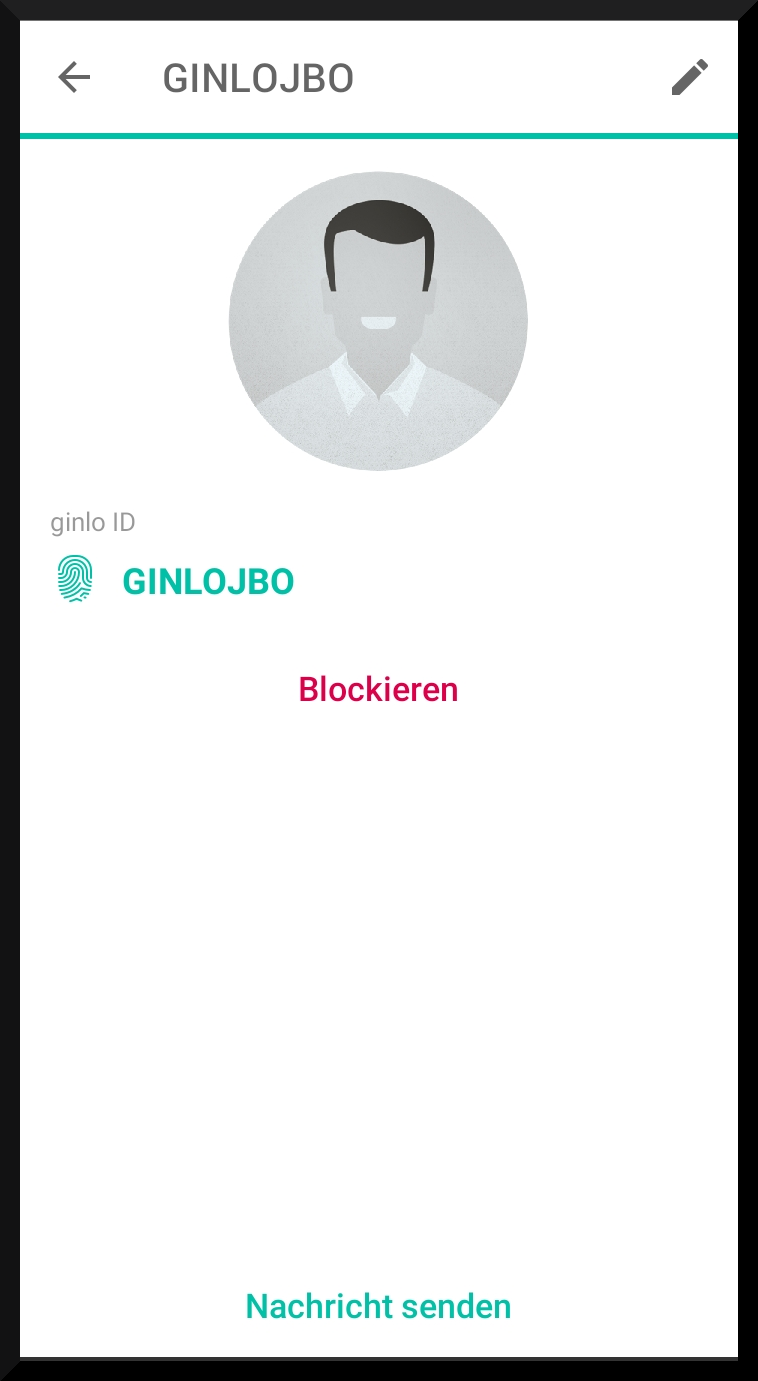
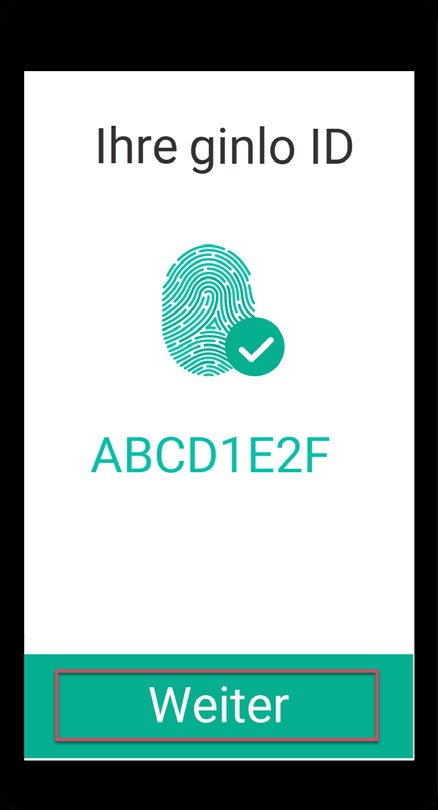
Your 8-digit ginlo ID will be displayed. You will see this later in your ginlo profile. You can share your ginlo ID with other ginlo users. They can then find you without knowing your mobile number to communicate via ginlo.
In order to be informed about the receipt of new messages, you should allow ginlo to send messages. After that tap Next.
Next, assign a name to be displayed in your messages. Optionally, you can upload a photo that will be displayed as an avatar. After that tap next.
Now you have the possibility to check if one of your contacts already has a ginlo account. For this you need access to your local phonebook.
Note
The access to your address book is only needed for searching known contacts within ginlo. This data is never transmitted in plain text to us, other subscribers or third parties. Encrypted values are generated locally on your device, which are compared with the also encrypted values of other users. There is no access from outside your device to the clear text data at any time!
Now your ginlo account is set up and you can start the first chat. Read more about this under Android or iOS.