4. Set up second device
Once you have set up your first device, you should add more devices to your account. All your content will then be automatically synced between all devices; an additional backup would not be necessary, but is always possible.
Important
To ensure the high security of ginlo, the keys used to encrypt your data and content are generated and stored exclusively on your device.
So if you only use one device for ginlo, this device is the only place where the keys needed for communication are located.
If this device is broken or lost, the keys cannot be recovered by us.
This is also true if you delete and subsequently reinstall the app installed on a single device.
The only way to restore your keys is by making a backup.
Therefore, be sure to create a backup - preferably immediately after installation - and keep this backup copy and the associated backup password in a safe place. You can find instructions on how to do this in the chapter User Manual for Android or User Manual for iOS under the keyword Backup.
Ideally, you also register a second device for your account - if allowed by your employer in the business sector. This will transfer the keys to this device as well.
The second device can be another cell phone, in ginlo Business also a desktop client or our web messenger.
In this way you can link up to three and in ginlo Business even up to 10 devices to your account.
Hint
On our YouTube channel the pairing of two devices is clearly explained!
4.1. ginlo2
Linking ginlo2 and ginlo Private or ginlo2 Business and ginlo Business is similar to setting up a second device.
In this case, both ginlo apps are treated as two devices. The original ginlo app is the first device, ginlo2 the second device.
Of course, you can install and use ginlo and ginlo2 in parallel on the same smartphone or desktop. Both apps must be used alternately for installation - this requires a little patience! Follow the step-by-step instructions below. Updated illustrated instructions are in preparation.
4.2. Smartphone as an additional device
On your existing device
In your initial device (smartphone or ginlo Desktop), go to Settings (Desktop: gear icon on the left edge).
In your profile you will find your ginlo ID. Copy or write it down!
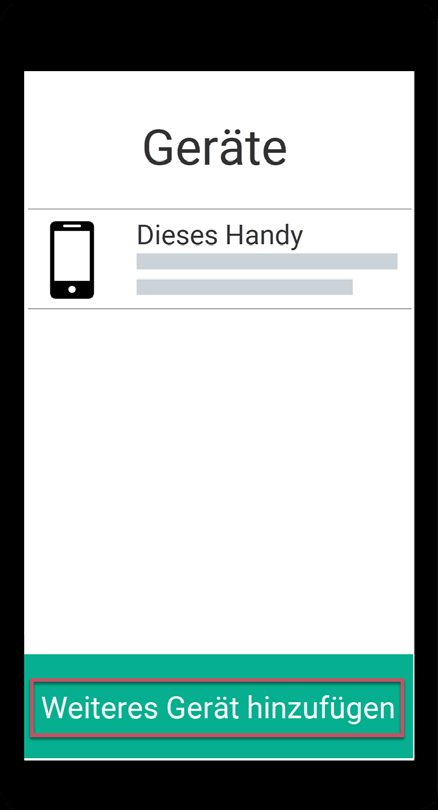
Now go back to Settings and select Devices - your already registered devices will be displayed.
Select Add another device*.
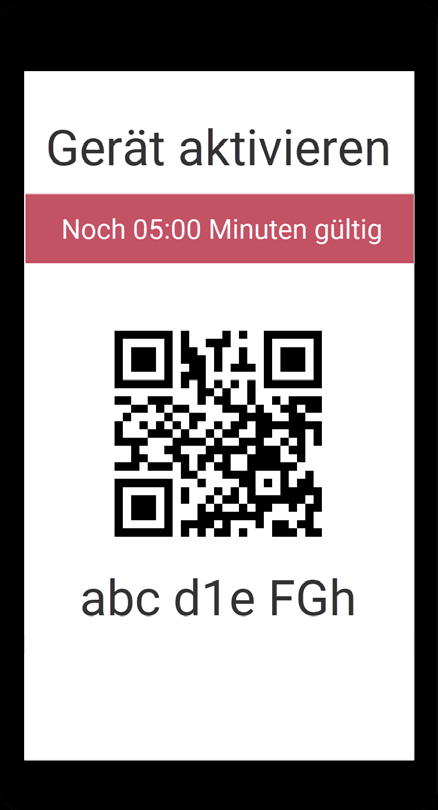
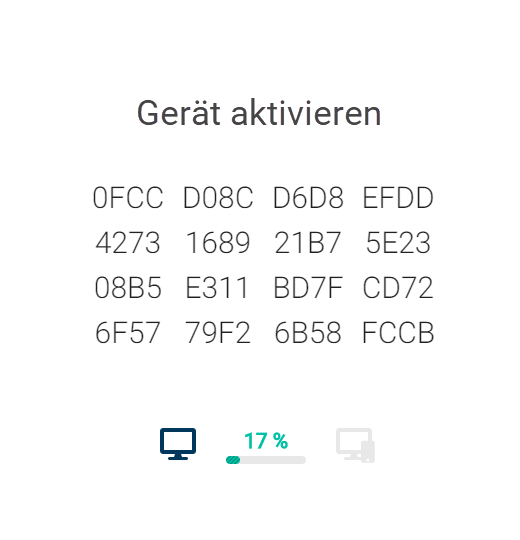
You will see a code to activate your new device. This code has a validity of 5 minutes; after expiration you can generate a new code.
On your new mobile device
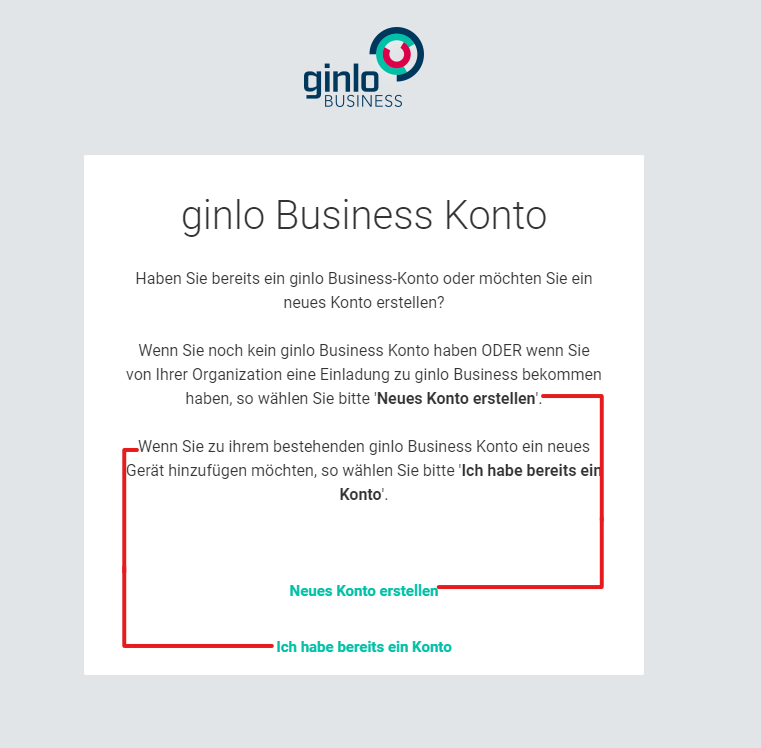
Open ginlo and tap Go -> I already have an account.
Tap on Add as another device and confirm.
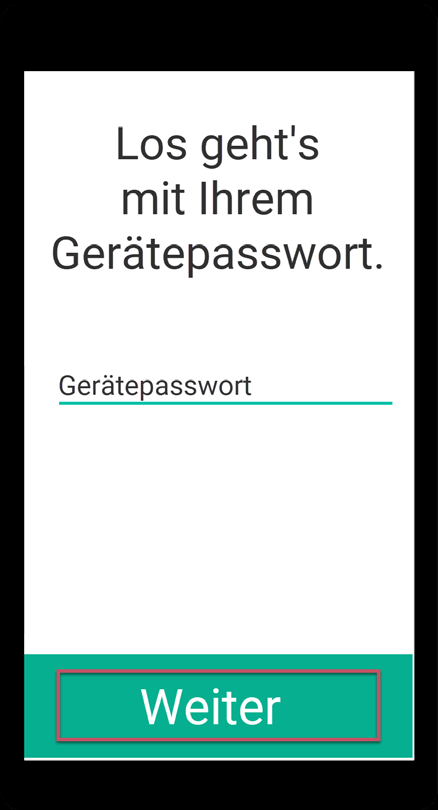
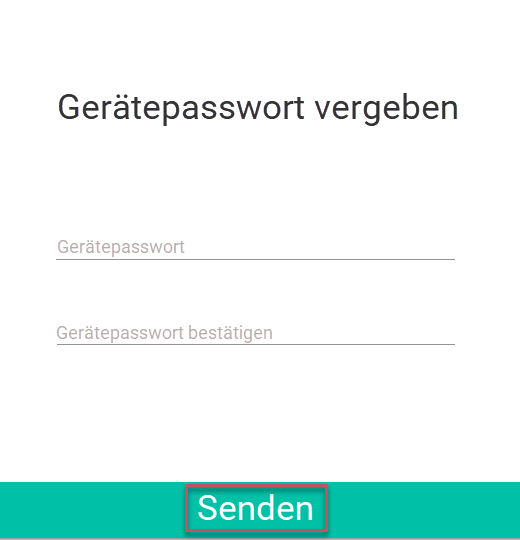
Assign a device password for your new device and confirm it on the following screen. This password will encrypt all ginlo content on this device.
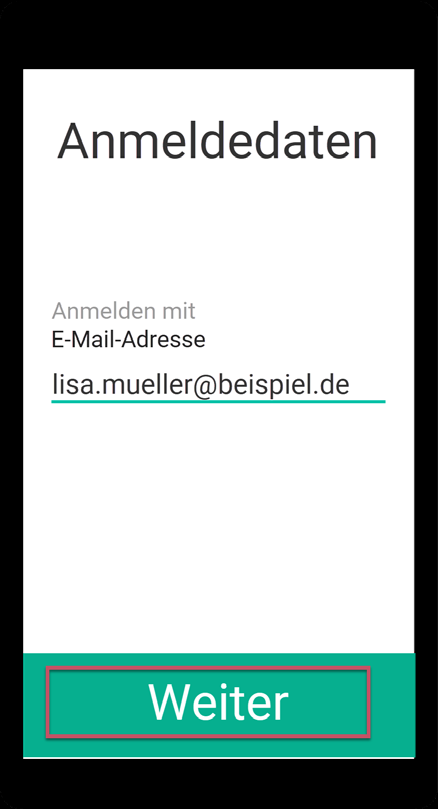
Press the small arrow next to email address and select ginlo ID.
Now paste your previously copied or noted ginlo ID.
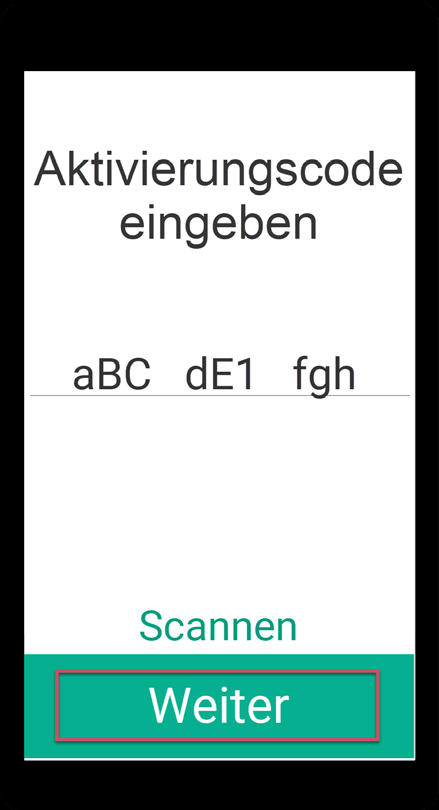
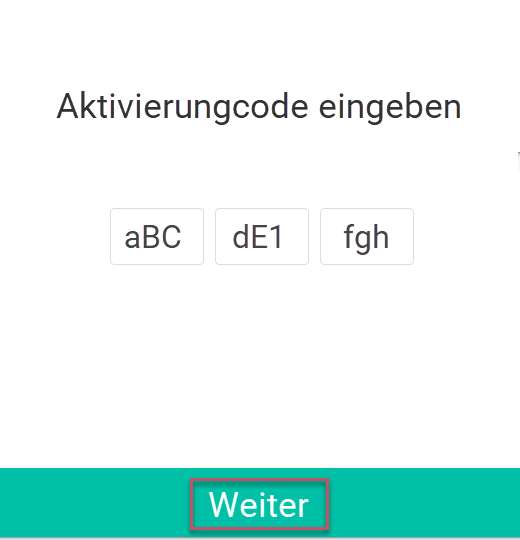
Enter the activation code displayed on your existing device, or tap Scan to scan the code and follow the further instructions.

On both devices
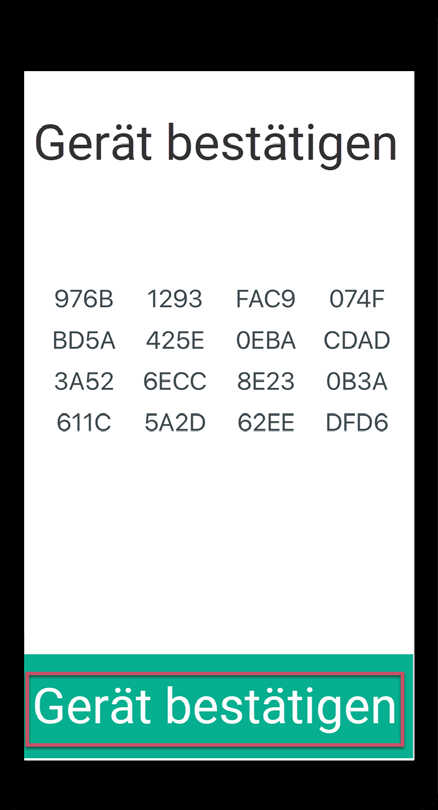
You will see a multi-digit security number on your existing and new device.
Verify that both numbers are identical, then on your existing device, select confirm device and understood.

Done! Your existing chats, files and contacts will now be downloaded to your new device. Depending on the amount of data to be transferred, this process may take longer - please be patient.
Hint
The following already existing chat content will be synchronized:
At ginlo Private these are messages which are not older than 30 days. If not set differently by the administrator for ginlo Business, all messages from the last 90 days are affected.
From now on, all new content will be automatically synchronized between all devices included in this way.
4.3. ginlo Desktop as an additional device
Download the ginlo Desktop Application under GINLO BUSINESS according to your operating system and follow the installation instructions.
Open the application and click Go on the welcome page.
Now select I already have an account.
On your existing device
Open ginlo Business and switch to devices (on Android) or settings -> devices (on iOS and in ginlo Desktop) via the toaster.
In your profile you will find your ginlo ID. Copy or write it down!
Go back to Settings and select Devices - your already registered devices will be displayed.
Select Add another device*.
You will see a code to activate your new device. This code has a validity of 5 minutes; after it expires you can generate a new code.
On your new desktop device
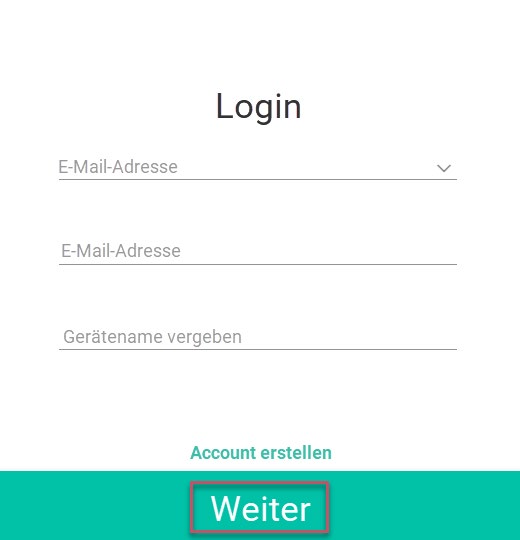
Press the small arrow next to email address and select ginlo ID.
Now paste your previously copied or noted ginlo ID.
Assign a device name - this will appear later in the settings under devices.
Enter the activation code that will be displayed on your existing device.
On both devices
You will see a multi-digit security number on your existing and new device.
Verify that both numbers are the same, then select Confirm device.
On your new device
A little bit of patience - it will take a moment for your new device to set up and for your existing content to download.
Enter and confirm a device password for your new device.
Note
This password will encrypt all of your content. You will have to enter it later to log in again in ginlo Desktop.
Done! Now nothing stands in the way of chatting on your new device. All new content will be automatically synced between all devices connected in this way from now on.
4.4. ginlo Web Messenger as an additional device
The ginlo Web Messenger is a browser-based application and works with all major browsers.
Warning
The ginlo Web Messenger should never be created as an initial device!
On your existing device
In your initial device (smartphone or ginlo Desktop), go to Settings (Desktop: gear icon on the left edge).
In your profile you will find your ginlo ID. Copy or write it down!
Now go back to Settings and select Devices - it will show your already registered devices.
Select Add another device.
You will see a code to activate your new device. This code is valid for 5 minutes; after it expires, you can generate a new code.
On your PC, laptop or tablet.
Start your browser and call the Login page of the ginlo Web Messenger.
Hint
Add this page to your favorites!
Press the small arrow next to cell phone number and select ginlo ID.
Now paste your previously copied or noted ginlo ID.
Assign a device name - this will appear later in the settings under devices.
Click on Next - and not (!) on Create account.
On both devices
You will see a multi-digit security number on your existing and new device.
Check that both numbers are identical, then select Confirm device.
Click confirm device on the initial device.
Wait for the synchronization process on the secondary device. Depending on the amount of data to be synchronized, this process may take longer - please be patient. After that click next.
Now assign a device password for your new device, confirm it and remember it well - best to write it down safely. With this password ginlo Business will be encrypted on your new device.
Click send.
Set the type of notification you want and click next.
Important
Check in the Preferences of your browser in Privacy section if cookies and data from websites are allowed to be stored. To be on the safe side, add an exception for the site https://webclient.ginlo.net permanently. Talk to your administrator!
Otherwise you may have to log in completely again after restarting your browser and calling up the https://webclient.ginlo.net page. In this case, the old web messenger on one of your other devices would have to be deleted beforehand.
But normally you will be shown the login page with your ginlo ID, where you only have to enter your device password.
The operation of ginlo Web Messenger corresponds in large parts to that of ginlo Desktop. Therefore, if you have any questions regarding operation, please refer to the chapter Operating instructions for the ginlo Desktop (B).